T-shirt Scarf


I have been wanting to make a unique scarf for sometime, and tonight, I finally found the time and energy to get after the project.  The tots went over to my dad's so I had a few hours to be crafty.  This is what I made:


I first spotted a similar one from a blogger at, kevinandamanda.com  I thought it couldn't be too hard, so tonight, I dug out a few shirts and went to work.

I'm not even kidding, this is so easy.  Really.  You can do it in an hour watching your favorite show on TV.  It's super simple, and all your friends are going to beg for one.  

I think, perhaps, my friends might find one in their Christmas gifts from me this year.... maybe.


To make this beauty  you need to dig out some old (or new, but okay to cut up) t-shirts.  I used four, a crimson, white, gray, and black.  If you know me, you know I'm supporting my Sooners with this one :)
Find some sharp scissors, and you are ready to go.


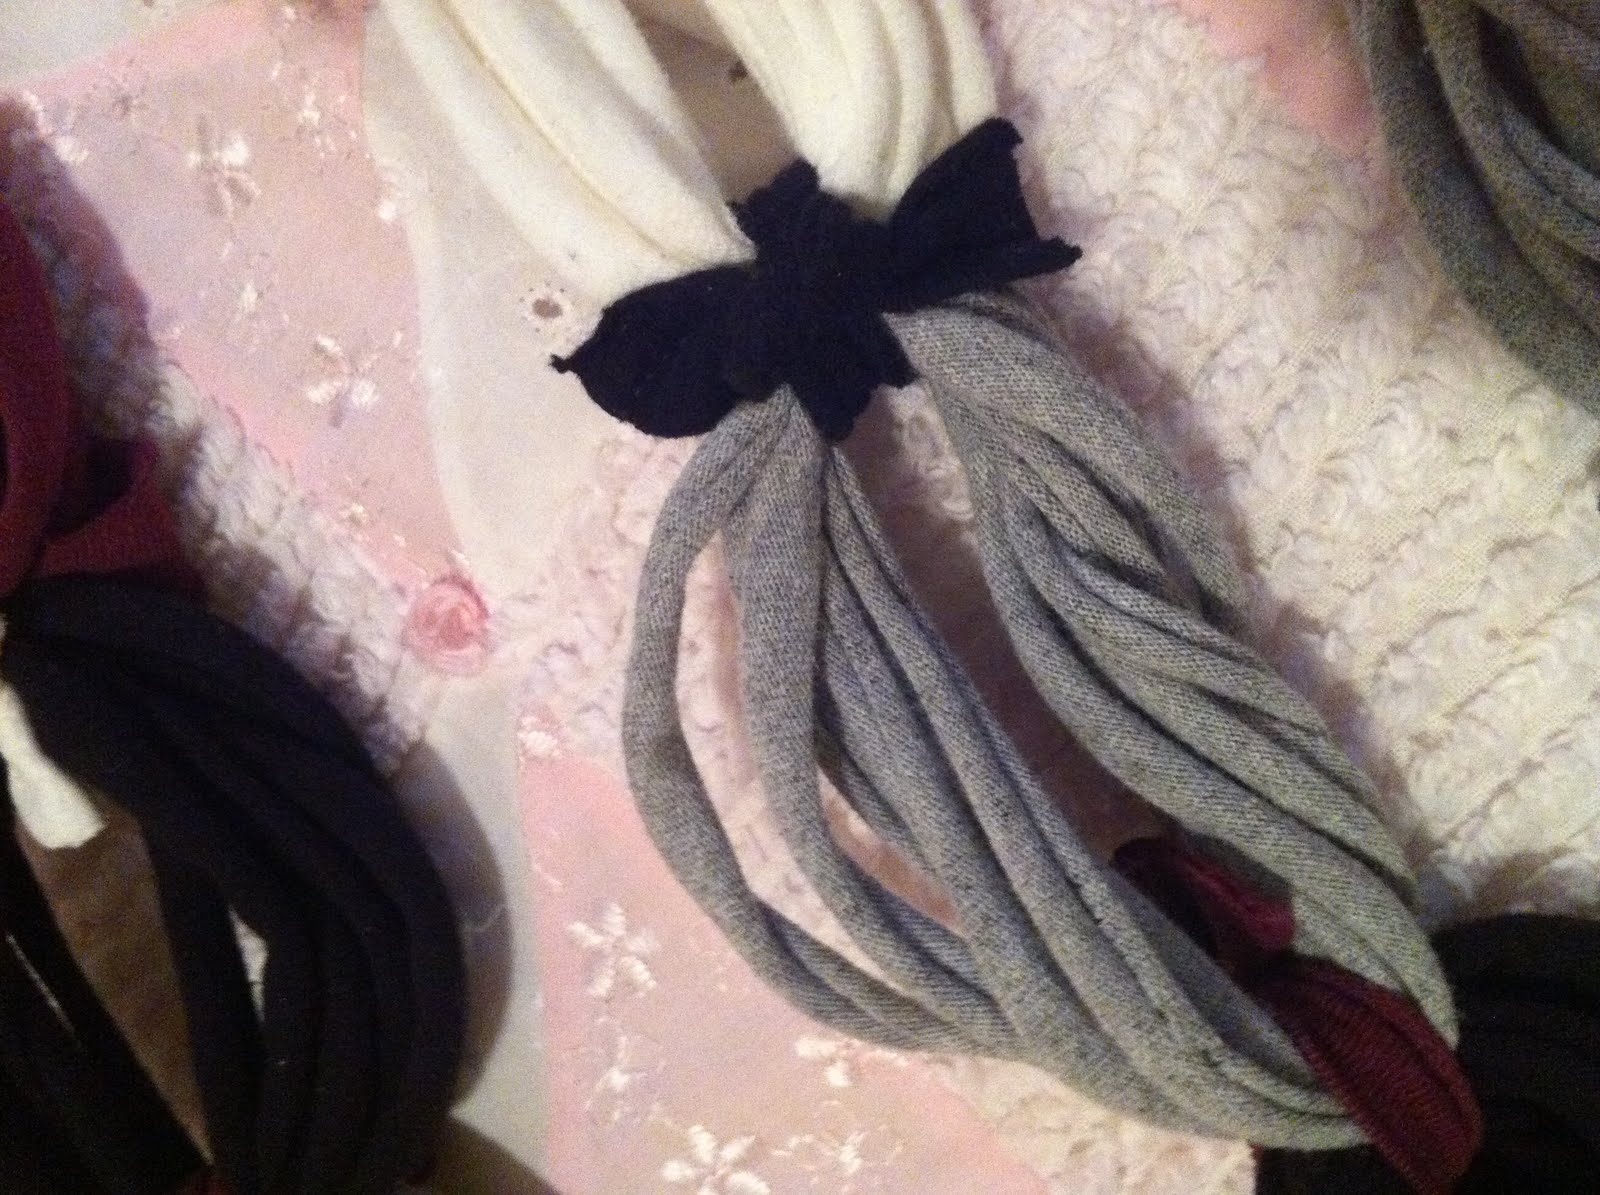
The first step  is to cut the hem off the bottom of the shirt and set it aside.  Later you will cut them into six inch strips and use them to attach your rings together.

Secondly, cut eight strips from the t-shirt.  When cut, it will look something like this:


Not only is this project super simple, you don't have to worry about cutting in super straight lines or worry about jagged edges.

Once all of the strips have been cut out, the fun begins.

Take a piece of fabric and pull on it.  Stretch it out as far as it will stretch.  Magically, your fabric will go from flat and jagged to long and turned in.  Awesome, right?

totally bad picture- sorry!


Stretch all strips then wind them around your fingers to make rings.  Set them aside:


Once you have them all stretched, begin to assemble.  Put two rings together and tie with a piece of the bottom cuff.  I used four shirts, so I ended up with 32 rings.  Use as many as you like.  That's the fun!


I can't wait to see if you make one.  If you do, leave me a comment, or link.  I am super happy I stumbled upon the tutorial myself.  Good Luck and...well.... boomer sooner :)  

Minnie Mouse Party

I have had TONS of emails asking how I made Emileigh's Minnie Mouse topiary that we used as the centerpiece for her second birthday party.  

I wish I could take total credit for the idea, unfortunately my creative juices are a bit low.  Thanks to Pinterest my juices are beginning to flow again.   I began my search  about a month before the big day. I could have spent a year getting ready for this party, however I had days... so I improvised.

Here are a couple of the projects I completed for the big day:


Minnie Mouse Topiary


Pillow case dress :) 


Cupcakes


The Topiary was the most time consuming project, but it turned out GREAT!  

It was super easy- you will need the following:

* Foam Topiary base found in most craft stores, I got mine from Hobby Lobby

* Foam floral balls, also from Hobby Lobby.  


* You will buy two sizes, bigger ones for the bottom and smaller for the top
These will be Minnie's ears :)

* Go out in the garden shed and grab a plastic pot, you're going to paint it, so it won't matter the condition.  


* Pull out your paint and paint brushes.  The fun is getting ready to begin :)

Miscellaneous:
*you will need tooth picks to apply the ears
*Ribbon of your choice for Minnie's bow
*Floral pins
*Ribbon for the outside of the pot (if necessary)
*Flowers of your choice to place at the bottom of the topiary
*hot glue gun and glue sticks

I also used these:

*They are dimensional stickers I found in the scrapbook section at hobby lobby.  I used them on the invites, the topiary, and anywhere else I could find that could use some "bling" :)

Directions:
  1. Clean, dry, and paint the plastic flower pot and set aside to dry.
  2. Paint the foam balls on the topiary tree.  I chose not to paint the wood rod, but might in the future.  It turned out okay with leaving it wood.
  3. Paint the foam balls used for Minnie's ears.  Once you have an ear painted, stick a tooth pick in the ball and then stick it onto the topiary base.  Remember, use the bigger size on the bottom and the smaller size ears for the top.  
  4. Cut your ribbon and place bows on the ears.   I hot glued mine 
    1. I took advantage and "blinged" mine up a bit with the scrapbook stickers :)
  5.  Wrap the pot with whatever ribbon you choose, I used zebra with a pink polka dot accent.  
  6. You will need to weight the pot- I used coins, it was the closest and easiest thing I could find at the time.  Rocks would work too.  Even sand if your pot doesn't have holes.  Coins worked for me - bonus birthday gift, right?
  7. Place the topiary in the pot.
  8. Cut and place flowers at the base of the topiary.  I used floral pins to stick them in the foam, they worked GREAT.
  9. Stand back and look at your creation- it is super cute and super easy!

Emileigh's room is decorated in Minnie Mouse theme, so this looks really cute sitting on her dresser.  I am really pleased with how it turned out.


The Dress was made by my grandmother.  I was happy with the way it turned out, however it hung a little strange for my liking.  Next time, we'll try a different style.  It was cute for the theme though.  We used the same ribbon on Minnie's bow on the dress and the topiary.  Keeping it in sync. HA.

The cupcakes were made by the bakery down the street.  Simply frosted with white icing and I added mini-oreos and pink ribbons for decorations.  I couldn't find any candy bows that I thought looked pretty enough for my princess, so I tied two dozen pink ribbon bows thirty minutes before the party.  It worked out.  Everyone knew to pull them off and pitch them, but my good ole grandpa.  He wanted to make a scene... it wouldn't be a party without him :)


Here are a few of my FAV pics from the party.


a typical fall day 2011

My grandparents are the biggest influences in my life.  They were my rock the entire time I was growing up, and still to this day, I immediately feel at home when I enter Slick and pull down the street to their house.

When they are gone (I can't even imagine) I know that I will never feel the same about Slick, or the little white house on Pershing street.  What makes that place feel like home, are the two people who live there.

My grandpa is the kindest person I know.  I'm sure there are a TON of stories that I don't know, but I that's the way I like it :)

When I was a little girl, I used to beg to stay at their house any time I could.  I'll admit, my grandpa always seemed a bit old to me.  The reality is, they weren't.  I can sit and think of my most cherished memories of him, and they always seem to be spent outside.  Grandpa would let me go with him to feed the dogs, then we would race back to the house.  I can remember, as I got older, he would run faster in order to teach me that I couldn't always win.  Looking back, I know how hard it was for him to let me win.  You see, Shelton's do not just let people win at anything.

My grandparents were at every softball game and dance recital that I ever played in that were in a 100 mile radius of their house.  EVERY ONE

When I was a little girl, my grandpa would help me climb up on the gate between lots at their house.  Once I was adjusted just right, he would push me through the openings.  I can remember coming in the house with sore and wind-burned cheeks from playing outside so long.

Can you even imagine how I felt, when I witnessed this:


I just stood there, watching my baby girl swing on the gate with my papa.  The same gate I swung on 30 years earlier.  The same strong hands pushing the gate.

The same smile on his face.


When we walked back to the house, Emileigh wanted to hold our hands....   Needless to say, I'll never ever forget this moment the rest of my life.